
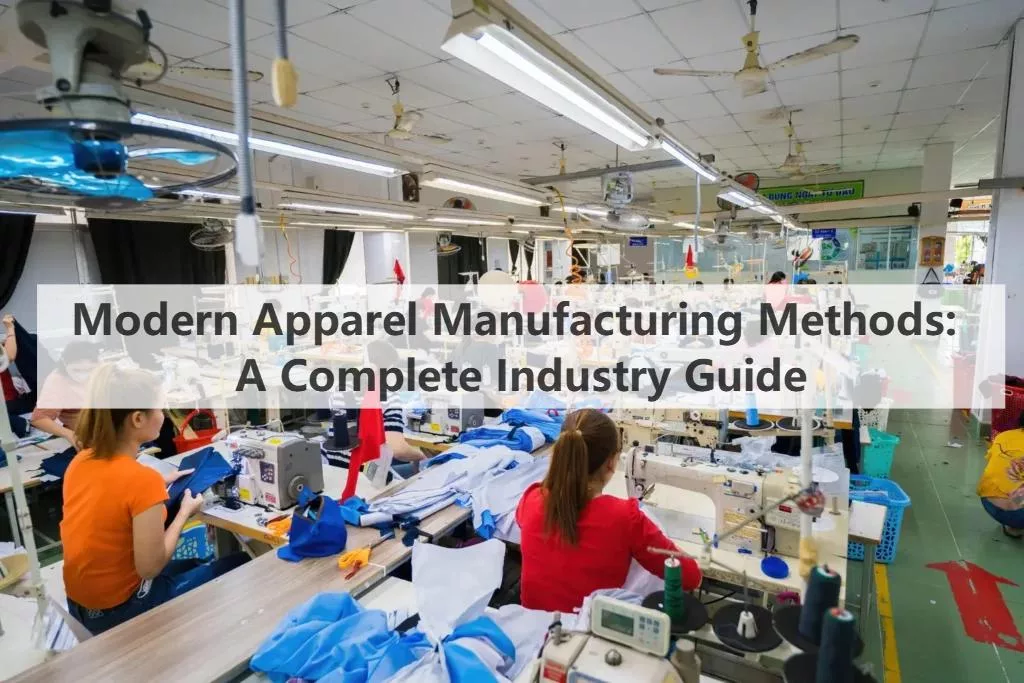

Most supply chain failures stem from selecting the wrong production workflow rather than poor design. I have navigated these factory floors to verify exactly what works for scaling brands. This guide helps you select the right apparel manufacturing methods by analyzing four critical layers: business models, contracting structures, production systems like modular manufacturing, and enabling technology. We frame this as a linear execution blueprint that balances sustainable practices with market speed. You will learn to implement strict documentation and quality gates derived from ISO 2859-1 sampling procedures so your bulk inventory matches your golden sample.
Prerequisites
Most manufacturing disputes stem from ambiguous specs. Gather these inputs to ensure your factory quotes against a production-ready standard:
- Product Definition: Document the target use case (e.g., high-performance vs. disposable promo), initial MOQ, and reorder frequency.
- Financials: Set hard caps for FOB (Free on Board) and DDP (Delivered Duty Paid) pricing.
- Tech Pack & BOM: A complete PDF with construction callouts, tolerances, and a Bill of Materials listing every trim and label.
- Design Assets: Vector artwork (.AI, .EPS) and Pantone TCX codes. Screen colors do not translate to dye formulas.
- Decision Roles: Appoint a specific Sample Approver and QC Manager to avoid sign-off bottlenecks.
- Timeline Strategy: Budget for 2–3 sampling rounds (10+ days each) and a 30–60 day bulk lead time.
Step 1: Assign the Assembly Path
Dictate the machinery based on your fabric structure.
- Woven Cut-and-Sew: Rigid items (Denim, Shirts). Requires Lockstitch (ISO 301).
- Knit Cut-and-Sew: Stretch items (Tees, Hoodies). Requires Overlock or Coverstitch.
- Seamless: Compression (Activewear). Uses tubular knitting cylinders.
- Bonded: Performance. Uses adhesive tape rather than needles.
Step 2: Define Construction Specs
Set the Stitch Density (SPI) to 12–14 SPI for durability. Higher density increases quality; lower density cuts costs but compromises structural integrity.
Step 3: Establish Acceptance Criteria
Lock these metrics in your Tech Pack to prevent manufacturing shortcuts:
- Seam Type: Specific ISO code (e.g., ISO 607 Flatlock).
- Density Range: Exact SPI count (e.g., 10–12).
- Tolerance: +/- 1mm seam allowance.
Step 4: Perform the Sensory Check
Verify the sample physically. Seams must lie flat without rippling. Run your finger along the stitch; it should feel embedded, not abrasive.
- Visual Cue: Check for glazing (shiny marks) near the seam, which indicates heat damage during pressing.
⚠️ Method Pitfall: Seam Puckering (rippling along the stitch line) is a defect caused by machine tension mismatch or differential feed issues. Reject samples with this flaw immediately.
Step 5: Match Manufacturing Method to Demand
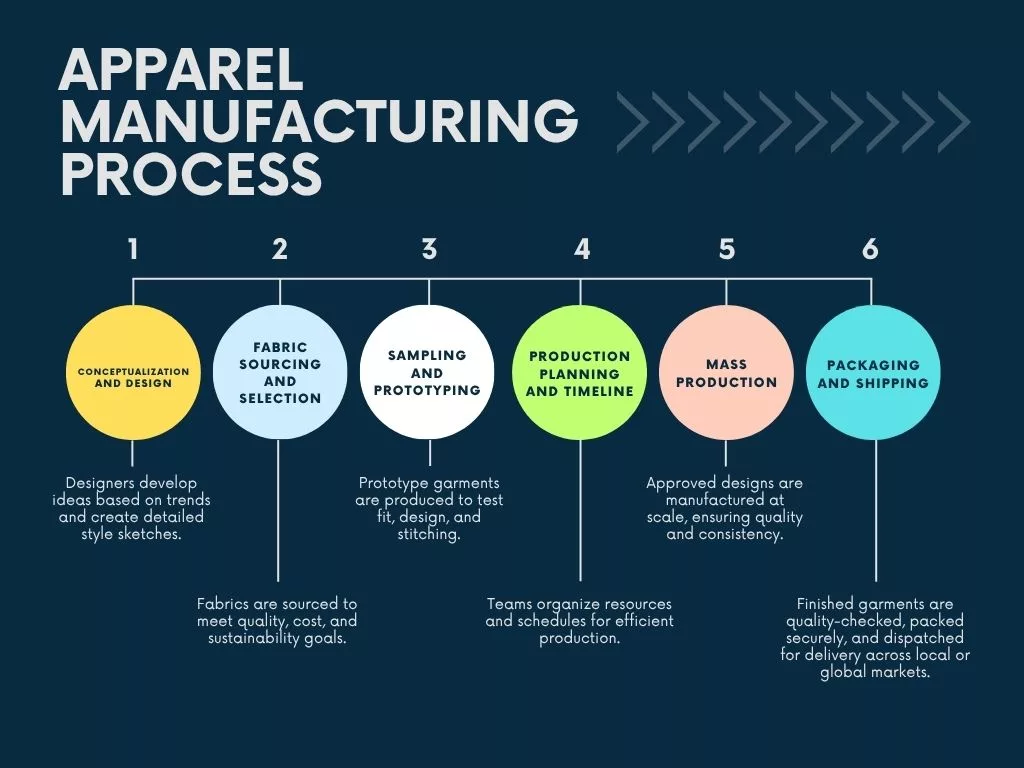
Construct a decision grid based on quantity, SKU complexity, and lead-time tolerance. Do not default to mass production for low unit costs; align your workflow with demand uncertainty.
Map your SKUs to the correct method:
- Mass Production ( >1,000 units): Wins on unit cost.
- Risk: Inventory liability and fabric variation.
- Action: Require shade bands and lab dips to monitor color consistency across lots.
- Small Batch ( <300 units): Wins on market testing.
- Risk: Inconsistent operator methods.
- Action: Enforce strict standard work instructions to minimize variance.
- Made-to-Order (MTO): Wins on waste reduction.
- Risk: Planning bottlenecks.
- Action: Audit queue management to confirm cut tickets align with order dates.
- Bespoke: Wins on premium customization.
- Risk: Fitting drift.
- Action: Lock measurement protocols and fitting schedules.
Verification Checkpoint: Select a Primary Model for launch and a Fallback Model for scale (e.g., Start Small Batch → Fallback to Mass).
Sensory Check: Inspect samples for "false speed." If you detect long stitch lengths (low SPI) or rough seam finishes, the factory is rushing execution.
🚀 Actionable Insight: Speed is logistics, not mechanics. "Fast Fashion" relies on shorter development cycles and tight replenishment loops, not sewing faster. Pushing unrealistic lead times guarantees inconsistent sizing. Always prioritize logo integrity over rushing the bulk date.
Step 6: Define the Sourcing Contract (CMT vs. FPP)
Select an engagement model to legally allocate liability for material defects. This choice dictates your financial risk exposure.
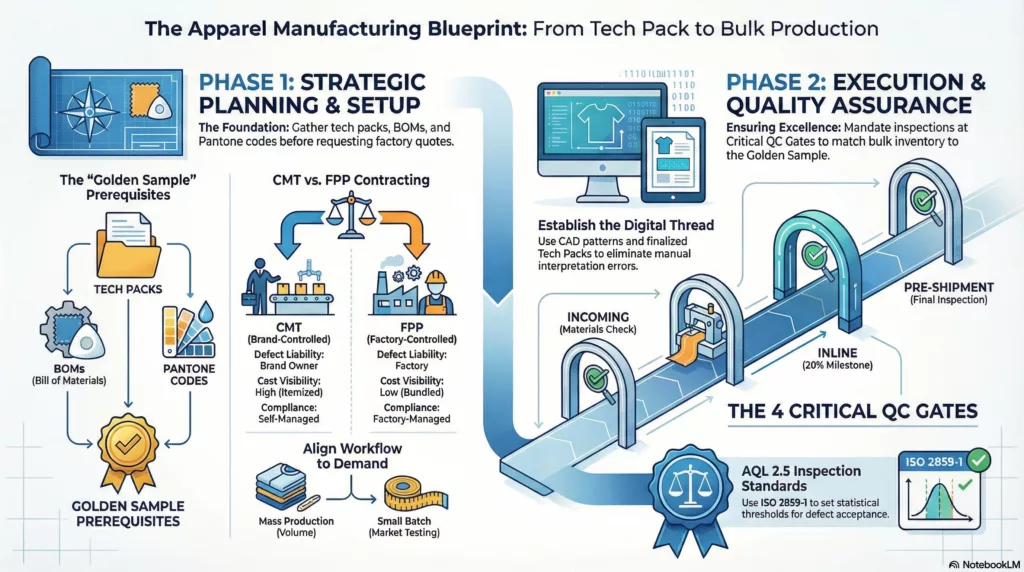
- Choose CMT (Cut, Make, Trim) to retain control. You supply the fabric; the factory cuts and sews.
- Liability: You bear the cost of fabric shrinkage, shade variation, and delivery delays.
- Choose FPP (Full Package Production) for turnkey execution. The factory manages sourcing, production, and packaging.
- Liability: The Factory assumes liability for input defects.
Use this matrix to assign risk:
| Feature | CMT (Brand-Controlled) | FPP (Factory-Controlled) |
|---|---|---|
| Defect Liability | You | Factory |
| Cost Visibility | High (Itemized) | Low (Bundled) |
| Compliance | You (Self-managed) | Factory (Managed) |
Consult our guide on types of clothingto match product categories with the correct model.
Verification Checkpoint: Your Purchase Order (PO) must include strict Substitution Rules. Explicitly state that unauthorized material swaps trigger automatic order rejection and full credit terms.
Sensory Check: Perform a Blind Touch Test. Compare the Approved Sample against a Bulk Unit without looking. If the bulk unit feels rougher or thinner, the factory has altered the sourcing specification to increase their margin.
Step 7: Standardize the Digital Thread and Markers
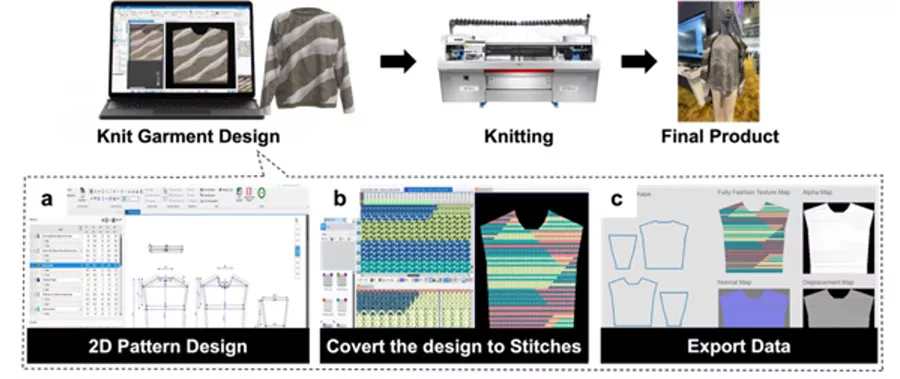
To eliminate interpretation errors, establish a Digital Thread that replaces temporary physical samples with permanent data. Submit a finalized technical package containing three core elements:
- CAD Pattern Files: Provide digitized patterns in .DXF or .AAMA format. Include a Graded Nest to verify size increments.
- Tech Pack: Explicitly list Stitch Per Inch (SPI), seam classifications, and machinery requirements.
- Bill of Materials (BOM): Define every component with approved suppliers or equivalency rules.
Audit the Marker: Review the Marker Plan for layout density. A "tight" marker optimizes fabric yield, directly lowering material cost per unit. While manual markers are valid for bespoke runs, use CAD systems for scalable, consistent output.
Verification Checkpoint: Run a "Spec Completeness Test." Your Tech Pack must answer 80% of a factory’s construction questions without requiring a phone call.
Sensory Check: Inspect outputs for aligned notches, consistent seam allowances, and clean grading increments. The marker layout should show no obvious wasted space between parts.
Step 8: Build the Materials & Compliance Checklist
Convert vague descriptions into pass/fail metrics. Create a Materials Spec Sheet containing these specific data points:
- Physical Attributes: Define Fiber Content, Weight (GSM), Weave, and Hand-feel.
- Performance Limits: Set strict tolerances for Shrinkage (e.g., <5%) and Torque.
- Sustainability: Demand Transaction Certificates for recycled inputs. Consult the official Global Recycled Standard (GRS) for documentation protocols.
⚠️ Warning: If selling to regulated markets, list Restricted Substances (RSL) to ensure REACH or Prop 65 compliance. Keep all chemical test reports on file.
Verification Checkpoint: Do not authorize bulk cutting until you approve:
- Lab Dips: For specific Pantone matching.
- Shade Bands: To define acceptable color variance across rolls.
- Fabric Testing Summary: Proof of passing shrinkage and colorfastness tests.
Sensory Check: Perform a Crocking Test. Rub a dry white cloth against the dyed fabric for ten seconds. If dye transfers to the cloth, the material fails.
Step 9: Select the Production Floor System
Match the factory’s manufacturing architecture to your product’s volume and complexity. Do not accept a generic "line" designation; the workflow dictates throughput and defect rates.
- Progressive Bundle System (PBS): Use for High Volume Basics. Operators process bundles (e.g., 20 sleeves) before passing them on. Note: High WIP levels often hide defects until late in production.
- Modular Cells: Use for Complex Styles. Cross-trained teams work in U-shaped cells for maximum agility and quality ownership.
- Unit Production System (UPS): Use for Speed. Automated overhead hangers move single garments between stations (One-Piece Flow).
Verify Process Control Request a Process Map. This document must explicitly define station cycle times, WIP limits, and rework handling protocols.
Sensory Check Scan the floor for "buffers." Large piles of semi-finished goods between machines indicate a sluggish system. A healthy line shows minimal material resting between operators and no growing "repair tables."
Step 10: Architect the Quality Control (QC) Gate
Distinguish Quality Assurance (QA) (process design) from Quality Control (QC) (product inspection). To scale, you must design quality into specific production gates using an AQL (Acceptable Quality Limit) plan.
Mandate inspections at four critical milestones:
- Incoming: Verify fabric GSM and trim accuracy before cutting.
- Pre-Production: Approve the first "off-line" unit (TOP).
- Inline: Inspect at 20% completion to catch systemic errors like thread tension issues.
- Pre-Shipment: Validate final packed goods before they leave the factory floor.
Execute the Verification Checkpoint: Place three artifacts on the inspection table: your signed Sealed Golden Sample, the approved Measurement Sheet, and a Defect Glossary defining Critical (unsafe), Major (functional), and Minor (cosmetic) faults.
Perform a physical sensory check: Do not just look; touch.
- Stretch Seams: Pull fabrics aggressively. If threads snap or show skipped stitches, reject the lot.
- Check Stability: Look for roping (twisting hems) or needle cuts (tiny holes) in knitwear.
- Test Prints: Stretch logos to check for ink cracking or peeling.
Step 11: Validate the Sample Sequence
Validate your apparel manufacturing methods by treating sampling as a compliance ladder. Enforce this strict hierarchy to isolate errors before mass production or custom promotional clothing runs:
- Prototype/Fit: Validates silhouette and movement.
- Size Set: Verifies grading across all SKUs.
- Pre-Production (PP): The Contract Master. Confirms fabric, trims, and print adhesion.
- Top of Production (TOP): The first assembly line unit.
Verification Checkpoint: Halt Production. Do not permit bulk cutting until the PP sample is approved in writing. For bespoke orders, replace early stages with physical fittings. For mass manufacturing, the TOP sample is mandatory.
Perform Sensory Checks:
- Audio Test: Stretch seams aggressively. A "pop" sound indicates bad tension.
- Tactile Test: Check Fabric Recovery (snap-back), zipper smoothness, and print hand-feel.
- Durability: Conduct wash/dry shrink tests and check for pilling.
⚠️ Safety First: Prevent Dye Lot Disasters. A perfect PP sample does not guarantee bulk consistency. Demand Lab Dips and Shade Bands to verify the bulk fabric roll matches the approved standard before cutting begins.
Step 12: Deploy Lean Manufacturing Discipline

Treat the factory floor as an operating system. Implement Lean principles to reduce waste (Muda) and stabilize consistency across the production run.
- Enforce Pillars: Apply 5S to organize workstations and Standardized Work to align operator movement. Use Value Stream Mapping to visualize and eliminate bottlenecks.
- Cap WIP: Set strict limits on piles between stations. If inventory accumulates, stop the line to balance flow (Just-in-Time).
- Error-Proof (Poka-yoke): Install physical machine guides (e.g., edge stops) to mechanically prevent defects before they occur.
- Contain Defects: Mandate First-Piece Approval immediately after every changeover to catch setup errors.
Verification Checkpoint: Track these daily production KPIs to confirm stability:
- Output vs. Plan: Monitor hourly target adherence.
- First-Pass Yield (FPY): The percentage of units requiring zero rework.
- Pareto Analysis: Identify the top 20% of defect types causing 80% of issues.
Sensory Check:
- Healthy: Steady rhythm (Takt time), clear visual controls, and empty rework racks.
- Unhealthy: Constant stoppages and "repair" piles growing faster than finished goods.
⚡ Power Move: Fix seam inconsistency. Operators often drift into individual habits. Mount Stitch Guide Cards and a physical Golden Sample at eye level. Conduct rapid audits at the start of every shift to ensure alignment.
Troubleshooting Common Production Failures
Even with a perfect Tech Pack, production variables drift. The difference between a minor hiccup and a total write-off is how quickly you diagnose the root cause and intervene. Use this protocol to resolve the four most critical production failures.
Error: Bulk Does Not Match Approved Sample
Diagnosis: This indicates "uncontrolled substitution" (cheaper stock fabric swapped in) or a missing Sealed Sample on the line. The Fix: Initiate a Stop-Ship order immediately. Do not release the balance payment. Retrieve your signed Top of Production (TOP) sample and photograph it side-by-side with the defects to force a rework or credit note.
Error: Fabric Bleed or Shade Variation
Diagnosis: Poor shade band control or "cross-contamination" from mixing dye lots in a single garment. The Fix: Enforce strict lot segregation—never mix Lot A and Lot B. Demand an immediate re-test for Colorfastness to Water (ISO 105-E01).
🤫 Insider Secret: If the bleeding is minor, ask the factory to perform an industrial"anti-stain wash"**. This strips excess surface dye without requiring a full production remake.
Error: Seam Puckering or Twisted Hems
Diagnosis: Improper differential feed settings, mismatched thread weight, or operators stretching the fabric during sewing. The Fix: Halt the line for a machine parameter reset. Ensure thread tension is balanced for the fabric weight. Verify patterns adhere to the grain line; off-grain cutting causes irreversible twisting that cannot be pressed out.
Error: Missed Delivery Date
The Fix: If the deadline is immovable (e.g., a trade show), calculate the cost delta to upgrade from Sea to Air Freight. If the delay is due to factory error, negotiate for them to absorb the air freight premium.
When to Escalate: The Evidence Checklist
Before rejecting an order, gather this specific evidence package to validate your claim under AQL 2.5 inspection standards:
- Visual Proof: High-res photos of the defect next to a ruler and the Golden Sample.
- Measurement Sheet: Data from 20+ random units compared against allowed tolerances.
- Defect Density: Exact counts (e.g., "15 fails per 100 units checked") to prove the failure rate exceeds the contract limit.
Final Thoughts: Mastering the Production Cycle
You have now architected a supply chain capable of scaling. By systematically selecting your demand model, defining the legal contracting structure (CMT vs. FPP), configuring the production system, and installing AQL quality gates, you have moved from a passive buyer to an operational partner.
Success now depends on rigid execution. Use this "done-right" checklist to govern your next steps:
- Approved Sealed Sample: Signed by the factory manager.
- Written Tolerances: Defined in the Tech Pack (e.g., +/- 0.5cm).
- Defect Glossary: Agreed definitions for Major vs. Minor faults.
- Scheduled Inspections: Pre-booked dates for Inline and Pre-Shipment checks.
- Shipment Plan: Confirmed incoterms (FOB or DDP).
Your immediate next action is to request quotes using your finalized tech pack and run a controlled sampling cycle. For readers evaluating regional options, explore our guide on custom clothing manufacturers in Australia.
If you require a partner to manage vetted factory sourcing, strict QC inspections, and global logistics, contact LeelinePromotion today to secure your supply chain.
Frequently Asked Questions for Apparel Manufacturing Methods
Q1. What is the difference between CMT and FPP manufacturing?
CMT (Cut, Make, Trim) requires the brand to supply all fabric and raw materials, offering maximum control but placing full liability for material defects on you. FPP (Full Package Production) is a turnkey solution where the factory manages the entire supply chain—sourcing, knitting, and assembly. Brands typically choose FPP to reduce operational complexity, while heritage brands prefer CMT to protect proprietary fabric sources.
Q2. How do I choose the right apparel manufacturing method?
Select your method based on demand volume and risk tolerance. Use Small Batch manufacturing (<300 units) or modular cells for market testing and high-complexity styles, as this prioritizes flexibility over unit cost. Transition to Mass Production (Progressive Bundle Systems) only when you have validated sales data for quantities exceeding 1,000 units to maximize efficiency and margin.
Q3. What is the AQL 2.5 quality standard?
AQL 2.5 (Acceptable Quality Limit) is the global industry baseline derived from ISO 2859-1. It defines the maximum number of defects allowed in a production lot before the entire shipment is rejected. For most apparel brands, this standard ensures that 97.5% of the inventory is defect-free, balancing consumer quality expectations with manufacturing reality.
Q4. Why does bulk production often differ from the sample?
Discrepancies usually occur because factories use premium materials for samples but substitute cheaper "stock" options for bulk orders, or because operator tension varies on the line. To prevent this, you must enforce a Sealed Golden Sample policy—a physical, signed counter-sample that serves as the non-negotiable standard for all incoming inventory inspections.